

The double crochet stitch is twice as tall as a single crochet, allowing you to finish blankets and scarves in half the time! It creates a soft, drapeable fabric with beautiful gaps. In this tutorial, we cover the exact steps to create a perfect double crochet and make straight edges every time.
Materials & Tools Required
To follow along with this project, you will need the following materials:
- **Yarn:** Worsted Weight Yarn.
- **Hook:** Size H-8 (5.0 mm) hook.
- **Skill Level:** Beginner.
Stitch Abbreviations & Guide
Before beginning, review these common abbreviations used throughout the pattern:
- **CH:** Chain
- **DC:** Double crochet
- **YO:** Yarn over
- **ST:** Stitch
Step-by-Step Instructions
Follow these detailed instructions to complete the project. Keep your stitch counts consistent!
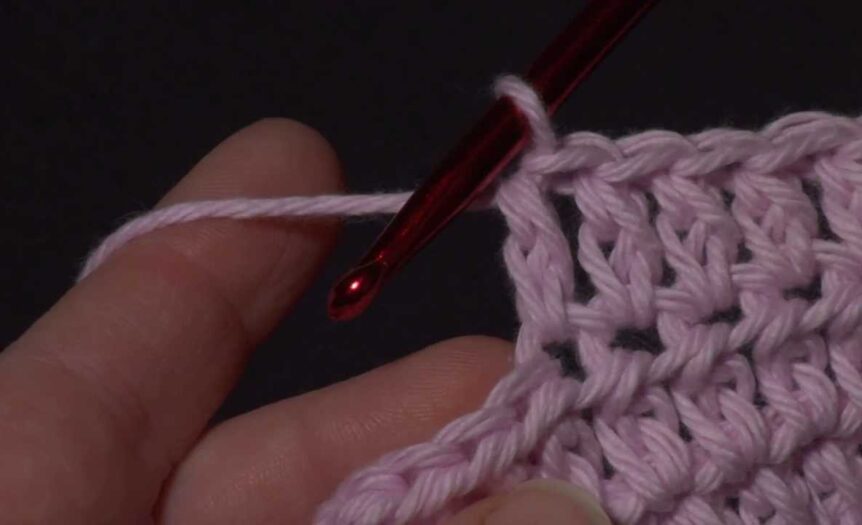
Double Crochet Step-by-Step
Pro Tips for Success & Pinterest Styling
Turning Chain Rule: In double crochet, the Ch 3 turning chain almost always counts as a stitch. This means your last stitch of Row 2 will be worked into the top of that starting Ch 3.
Pinterest Share: Create a clean graphic demonstrating the ‘Yarn Over’ step. Visual stitching guides are high performers.
Frequently Asked Questions
Q: Why is the edge of my double crochet project uneven?
A: This is usually due to confusion about whether the turning Ch 3 counts as a stitch. Count your stitches at the end of every row!
Q: Can I use double crochet for amigurumi?
A: It is not recommended because the stitches are too tall and create gaps where the stuffing will leak out.
Conclusion
Mastering this project is a wonderful milestone in your crochet journey. Once you finish, be sure to pin it on Pinterest to save it for your next crafting session and share your beautiful results with the community! Happy crocheting!


")
