

Table of Contents
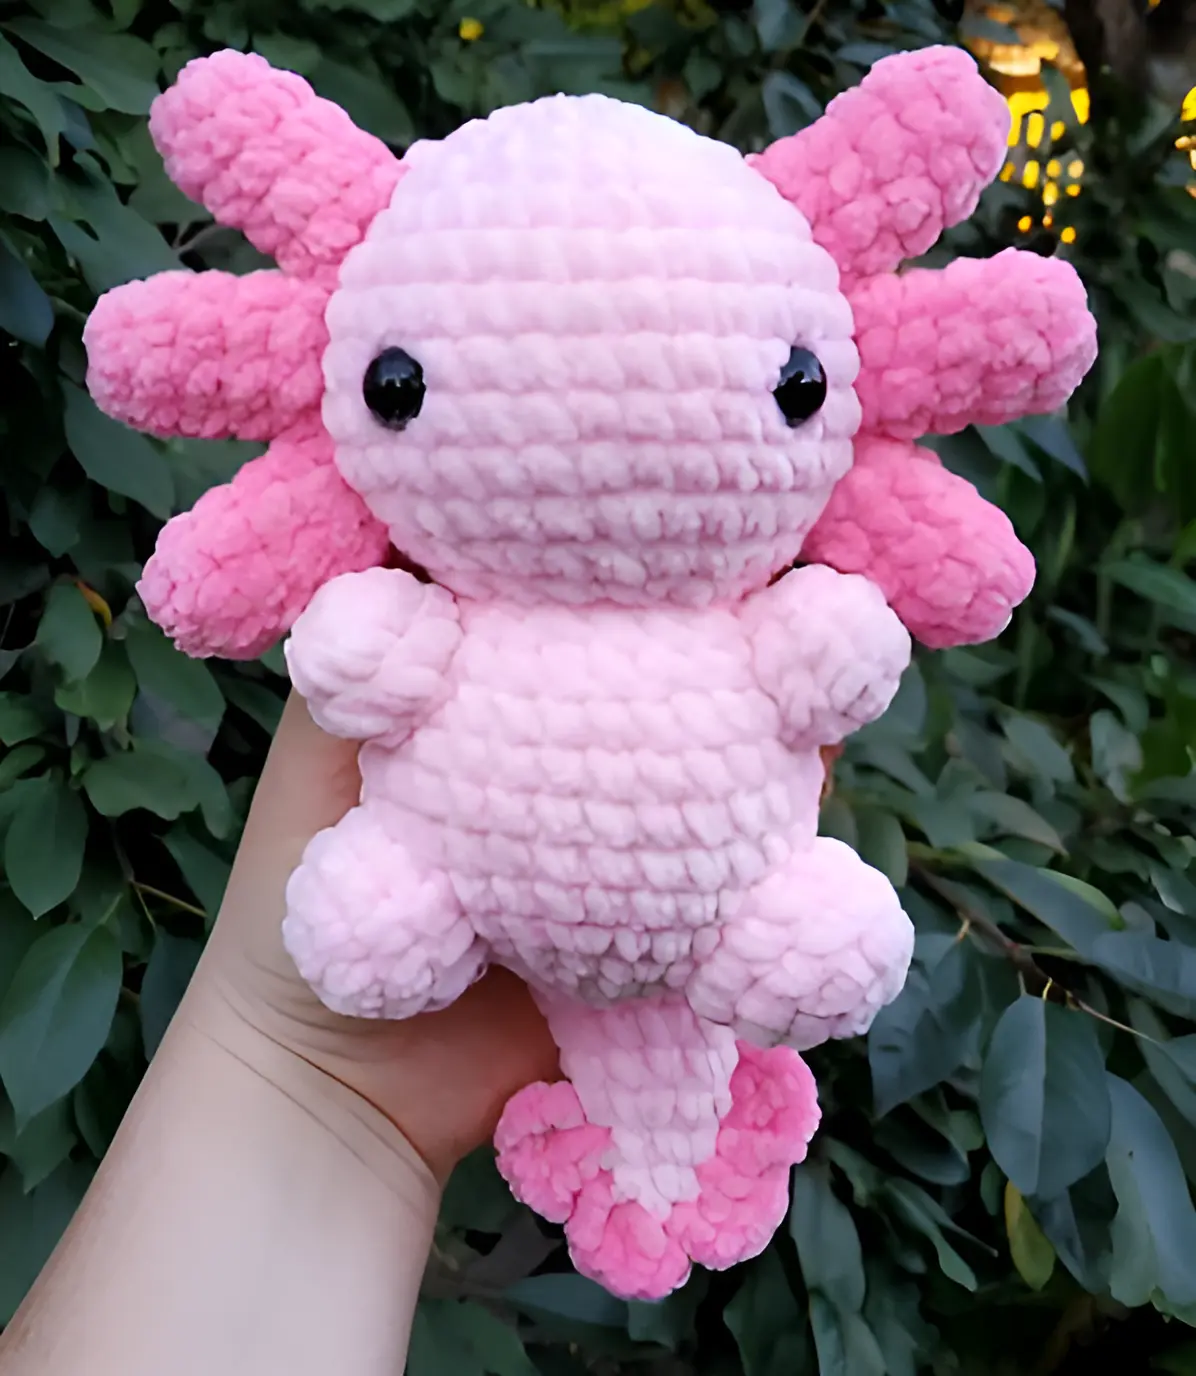
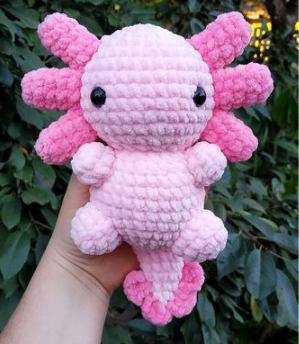
This detailed crochet pattern will guide you through creating an adorable axolotl plushie. With step-by-step instructions, tips for beginners, and clear stitch counts, you’ll have a cute aquatic friend in no time! This pattern uses US crochet terminology and is designed for intermediate crocheters, though beginners with basic stitch knowledge can follow along.
Materials Needed
- Yarn: Medium-weight yarn (worsted weight, category 4) in:
- Main Color (MC) for head, body, arms, legs, and tail (e.g., pink or light purple).
- Contrast Color (CC) for tail and fins (e.g., darker pink or contrasting shade).
- Small amount of accent yarn for tail fins (e.g., white or sparkly yarn).
- Hook: 3.5mm (E) or 4mm (G) crochet hook, depending on your tension.
- Safety Eyes: 10mm, placed between rounds 7-8 on the head.
- Stuffing: Polyester fiberfill for a soft, squishy plushie.
- Tools: Yarn needle, stitch markers, scissors.
- Optional: Embroidery thread for adding facial details (e.g., a smile).
Abbreviations
- sc: Single crochet
- inc: Increase (2 sc in the same stitch)
- dec: Decrease (sc 2 together)
- slst: Slip stitch
- mr: Magic ring
- ch: Chain
- dc: Double crochet
- rnd: Round
- MC: Main Color
- CC: Contrast Color
Notes
- Work in continuous rounds (spirals) unless stated otherwise. Use a stitch marker to track the start of each round.
- Stuff pieces firmly but avoid overstuffing to maintain shape.
- Adjust hook size if your stitches are too loose or tight to ensure a snug fabric that hides stuffing.
- Fasten off each piece with a long tail (about 12 inches) for sewing.
Pattern Instructions
Head
The head is worked in the main color (MC) and shaped to be round and slightly wider at the middle.
- Rnd 1: 6 sc in mr [6]
- Rnd 2: inc x6 [12]
- Rnd 3: (sc, inc) x6 [18]
- Rnd 4: (2 sc, inc) x6 [24]
- Rnd 5: (3 sc, inc) x6 [30]
- Rnd 6-9: 30 sc [30] (4 rounds)
- Rnd 10: (3 sc, dec) x6 [24]
- Rnd 11: (2 sc, dec) x6 [18]
- Rnd 12: (1 sc, dec) x6 [12]
Assembly Tips:
- Insert 10mm safety eyes between rounds 7 and 8, with 7 stitches between them (count 7 sc across).
- Stuff the head firmly, shaping it into a smooth sphere.
- Fasten off, leaving a long tail (12 inches) for sewing to the body.
Body
The body is slightly larger than the head and tapers at the bottom for a cute, chubby shape.
- Rnd 1: 6 sc in mr [6]
- Rnd 2: inc x6 [12]
- Rnd 3: (sc, inc) x6 [18]
- Rnd 4: (2 sc, inc) x6 [24]
- Rnd 5: (3 sc, inc) x6 [30]
- Rnd 6: (4 sc, inc) x6 [36]
- Rnd 7-10: 36 sc [36] (4 rounds)
- Rnd 11: (4 sc, dec) x6 [30]
- Rnd 12: (3 sc, dec) x6 [24]
- Rnd 13: (2 sc, dec) x6 [18]
- Rnd 14: (1 sc, dec) x6 [12]
Assembly Tips:
- Stuff the body firmly, ensuring it’s plump but not overstuffed.
- Fasten off, leaving a long tail for sewing to the head.
Arms (Make 2)
The arms are small and slightly tapered, giving the axolotl a cute, stubby look.
- Rnd 1: 6 sc in mr [6]
- Rnd 2: inc x6 [12]
- Rnd 3-4: 12 sc [12] (2 rounds)
Assembly Tips:
- Lightly stuff the arms to keep them soft and flexible.
- Fasten off, leaving a long tail for sewing to the body.
Legs (Make 2)
The legs are wider and slightly longer than the arms for balance.
- Rnd 1: 8 sc in mr [8]
- Rnd 2: inc x8 [16]
- Rnd 3-5: 16 sc [16] (3 rounds)
Assembly Tips:
- Stuff the legs moderately to maintain their shape.
- Fasten off, leaving a long tail for sewing to the body.
Gills (Make 6)
The gills are long, thin tubes that add the axolotl’s signature look. Make three for each side of the head.
- Rnd 1: 6 sc in mr [6]
- Rnd 2-7: 6 sc [6] (6 rounds)
- Rnd 8: 6 slst [6]
Assembly Tips:
- Do not stuff the gills to keep them flexible and wispy.
- Fasten off, leaving a long tail for sewing to the head.
Tai
The tail is worked in both the main color (MC) and contrast color (CC) to create a striped effect.
- Rnd 1: With CC, 4 sc in mr [4]
- Rnd 2: (1 sc, inc) x2 [6]
- Rnd 3: Switch to MC, 6 sc [6]
- Rnd 4: (1 sc, inc) x3 [9]
- Rnd 5: Switch to CC, 9 sc [9]
- Rnd 6: (1 sc, inc) x4, 1 sc [12]
- Rnd 7: 12 sc [12]
- Rnd 8: (1 sc, inc) x5, 3 sc [18]
- Rnd 9: 18 sc [18]
Assembly Tips:
- Lightly stuff the tail to keep it flexible.
- Fasten off, leaving a long tail for sewing to the body.
Tail Fins
The tail fins add a frilly, aquatic touch. Use a contrasting or sparkly yarn for a fun effect.
- Attach accent yarn to the edge of round 4 on the tail.
- Fin Pattern:
- Ch 1, 3 dc in the next st, skip 1 st, slst in the next st.
- Continue working toward the magic ring (tip of the tail).
- At the tip: 3 dc in the magic ring stitch, skip 1 st, slst in the next st on the opposite side of the tail.
- Work back up the other side: Ch 1, 3 dc in the next st, skip 1 st, slst in the next st.
- Fasten off and weave in ends.
Tips:
- Ensure fins are evenly spaced for a symmetrical look.
- Use a yarn needle to secure loose ends neatly.
Assembly
- Head to Body: Sew the head to the body using the long tail from the head. Align the bottom of the head (rnd 12) with the top of the body (rnd 1). Use a whip stitch for a secure join.
- Arms: Attach arms to the sides of the body, just below the head (around rounds 8-9 of the body), about 5 stitches apart from the front center.
- Legs: Sew legs to the bottom sides of the body (around rounds 11-12), slightly forward from the tail for balance.
- Tail: Attach the tail to the back of the body, centered between the legs but slightly lower (around rounds 11-13). Ensure it’s secure and slightly curved upward.
- Gills: Sew three gills to each side of the head, evenly spaced between rounds 6-9. Angle them slightly outward for a natural look.
- Optional Details: Use embroidery thread to add a small smile or blush marks below the eyes for extra cuteness.
Finishing Touches
- Weave in Ends: Use a yarn needle to hide any remaining yarn tails inside the plushie.
- Shape: Gently squeeze and shape the axolotl to ensure all parts are proportional.
- Check Stability: Ensure all sewn parts are secure to withstand gentle handling.
Tips for Success
- Tension: Keep consistent tension to avoid gaps where stuffing might show.
- Stuffing: Add stuffing gradually, using small amounts to avoid lumps.
- Customization: Experiment with colors (e.g., pastel axolotls or vibrant neons) or add accessories like a tiny scarf.
- Beginner Help: If you’re new to amigurumi, practice the magic ring and single crochet stitches before starting.
Enjoy crocheting your axolotl plushie! Share your creation with fellow crafters or gift it to an axolotl lover. Happy hooking!


")
