


Have you ever made a sweater only to find it fits a giant instead of you? The culprit is gauge. Gauge is the measure of how tight or loose your stitches are compared to the designer’s stitches. In this tutorial, we explain how to knit a gauge swatch and adjust your hook to get the perfect fit.
Materials & Tools Required
To follow along with this project, you will need the following materials:
- **Yarn:** Project yarn.
- **Hook:** Recommended hook.
- **Notions:** Measuring tape, stitch marker.
- **Skill Level:** Intermediate.
Stitch Abbreviations & Guide
Before beginning, review these common abbreviations used throughout the pattern:
- **N/A**
Step-by-Step Instructions
Follow these detailed instructions to complete the project. Keep your stitch counts consistent!
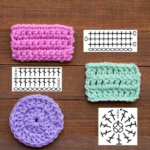
How to Make a Gauge Swatch
Pro Tips for Success & Pinterest Styling
Wash Your Swatch: Wash and block your swatch before measuring! Yarns behave differently after blocking, and this is what will happen to your final garment.
Pinterest Share: A graphic showing a measuring tape resting on a swatch with counted stitches is highly educational and saved.
Frequently Asked Questions
Q: Do I need to measure gauge for blankets or scarves?
A: It is not critical for blankets, but it is absolute key for garments, hats, and mittens where sizing matters.
Q: Can I just adjust my tension instead of changing hooks?
A: No. It is almost impossible to maintain a forced tension across an entire project. It is much easier to let the hook size do the work.
Conclusion
Mastering this project is a wonderful milestone in your crochet journey. Once you finish, be sure to pin it on Pinterest to save it for your next crafting session and share your beautiful results with the community! Happy crocheting!


")
