Skip to content

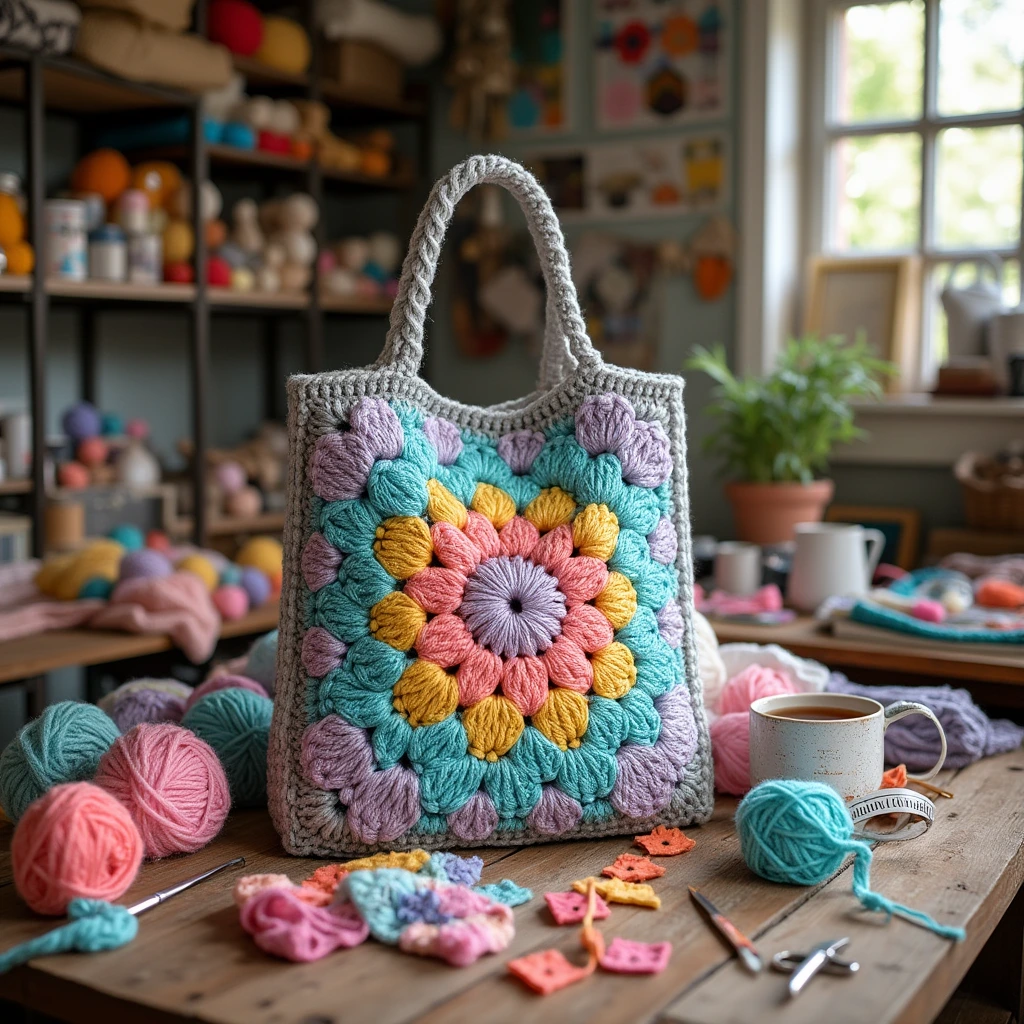
Step 1: Pick Your Yarn and Colors
Choose yarns and colors that reflect your vibe. Go for a soft, neutral palette for a classic look or bold, bright hues for a standout piece. Cotton yarn is durable and great for bags, but wool works too. Test your yarn with your hook to ensure the right tension.
Step 2: Crochet the Squares
Create squares using a simple stitch like single crochet or double crochet. Decide on the size of your squares (e.g., 4×4 inches for a small bag or 6×6 inches for a larger one). Make enough squares for the front and back of your bag—typically 8–12 squares total, depending on your design. Keep them uniform for a polished look.
Tip: Experiment with different stitches or color patterns in each square for a unique design.
Step 3: Join the Squares
Lay out your squares in the desired pattern (e.g., a grid or staggered rows). Use a sewing needle and matching thread to stitch them together. Align edges carefully for a neat finish. Sew squares into two identical panels—one for the front and one for the back.
Step 4: Sew the Bag Together
Fold the panels with the right sides facing inward. Sew the sides and bottom using strong thread to form the bag’s body. Reinforce seams to ensure durability, especially if you plan to carry heavier items. Leave the top open.
Step 5: Add Handles
Attach pre-made handles or craft your own:
- Pre-made handles: Follow the manufacturer’s instructions to secure them to the bag’s topikistan
System: It looks like my response was cut off. Let me complete the guide for you with the remaining steps and ensure it’s optimized for SEO with clear, beginner-friendly language. I’ll also wrap the full artifact correctly and avoid any mention of “blogger” as requested.
How to Crochet a Stylish Bag with Squares – Easy DIY Guide
Crocheting a bag with squares is a fun, creative way to craft a trendy, functional accessory. This beginner-friendly guide walks you through each step to make a custom crochet bag. Perfect for showcasing your style, this project lets you play with colors, patterns, and details. Let’s dive in and create a bag that’s uniquely yours!
What You’ll Need
Before starting, gather these supplies:
- Cotton or wool yarn in your favorite colors
- Crochet hook (check yarn label for size)
- Scissors
- Sewing needle and thread
- Bag handles (pre-made or materials like leather, rope, or chain)
# How to Crochet a Stylish Bag with Squares
Step 1: Pick Your Yarn and Colors
Choose yarn and colors that match your style. Cotton yarn is sturdy and ideal for bags, while wool adds a cozy feel. Opt for a neutral palette for a timeless look or vibrant shades for a bold statement. Test your yarn with your hook to ensure smooth stitching.
SEO Tip: Popular color combos like pastels or earth tones are trending for 2025 crochet projects.
Step 2: Crochet the Squares
Use a simple stitch like single crochet or double crochet to make squares. Choose a size (e.g., 4×4 inches for a small bag or 6×6 inches for a larger one). Craft 8–12 squares total, depending on your bag’s size, ensuring equal numbers for the front and back panels. Keep sizes consistent for a polished result.
Tip: Mix stitches or colors within squares for a custom design.
Step 3: Join the Squares
Arrange squares in your desired pattern, such as a grid or offset rows. Stitch them together using a sewing needle and matching thread, aligning edges for a clean look. Create two identical panels—one for the front and one for the back of the bag.
Step 4: Sew the Bag Together
Fold the panels with the right sides facing inward. Use strong thread to sew the sides and bottom, forming the bag’s body. Reinforce seams for durability, especially for carrying heavier items. Leave the top open.
Step 5: Add Handles
Attach handles to complete your bag:
- Pre-made handles: Secure them to the bag’s top edges following the manufacturer’s instructions. Ensure they’re firmly attached to hold weight.
- DIY handles: Cut leather, rope, or chain to your desired length. Make small holes on the bag’s top sides, thread the material through, and sew the ends securely with needle and thread.
SEO Tip: Search for “crochet bag handles” to find trendy options like wooden or bamboo handles.
Step 6: Add Finishing Touches
Personalize your bag with fun details. Add a crocheted border, pom-poms, tassels, buttons, or beads to reflect your style. Experiment with textures or patterns to make your bag stand out.
Step 7: Care for Your Bag
To keep your bag looking great, follow the yarn’s washing instructions. Hand-wash with cold water and mild soap for safety. Avoid hanging the bag by its handles to prevent stretching. Store it in a dry, airy spot away from direct sunlight.
Why Make a Crochet Square Bag?
This project is perfect for beginners and experienced crocheters alike. It’s budget-friendly, customizable, and a great way to practice basic stitches. Plus, handmade bags are eco-friendly and make thoughtful gifts. Show off your creativity with a one-of-a-kind accessory!
Ready to Start?
Grab your yarn and hook, and follow this guide to create a stylish crochet bag. Share your finished project with friends or on social media to inspire others!